
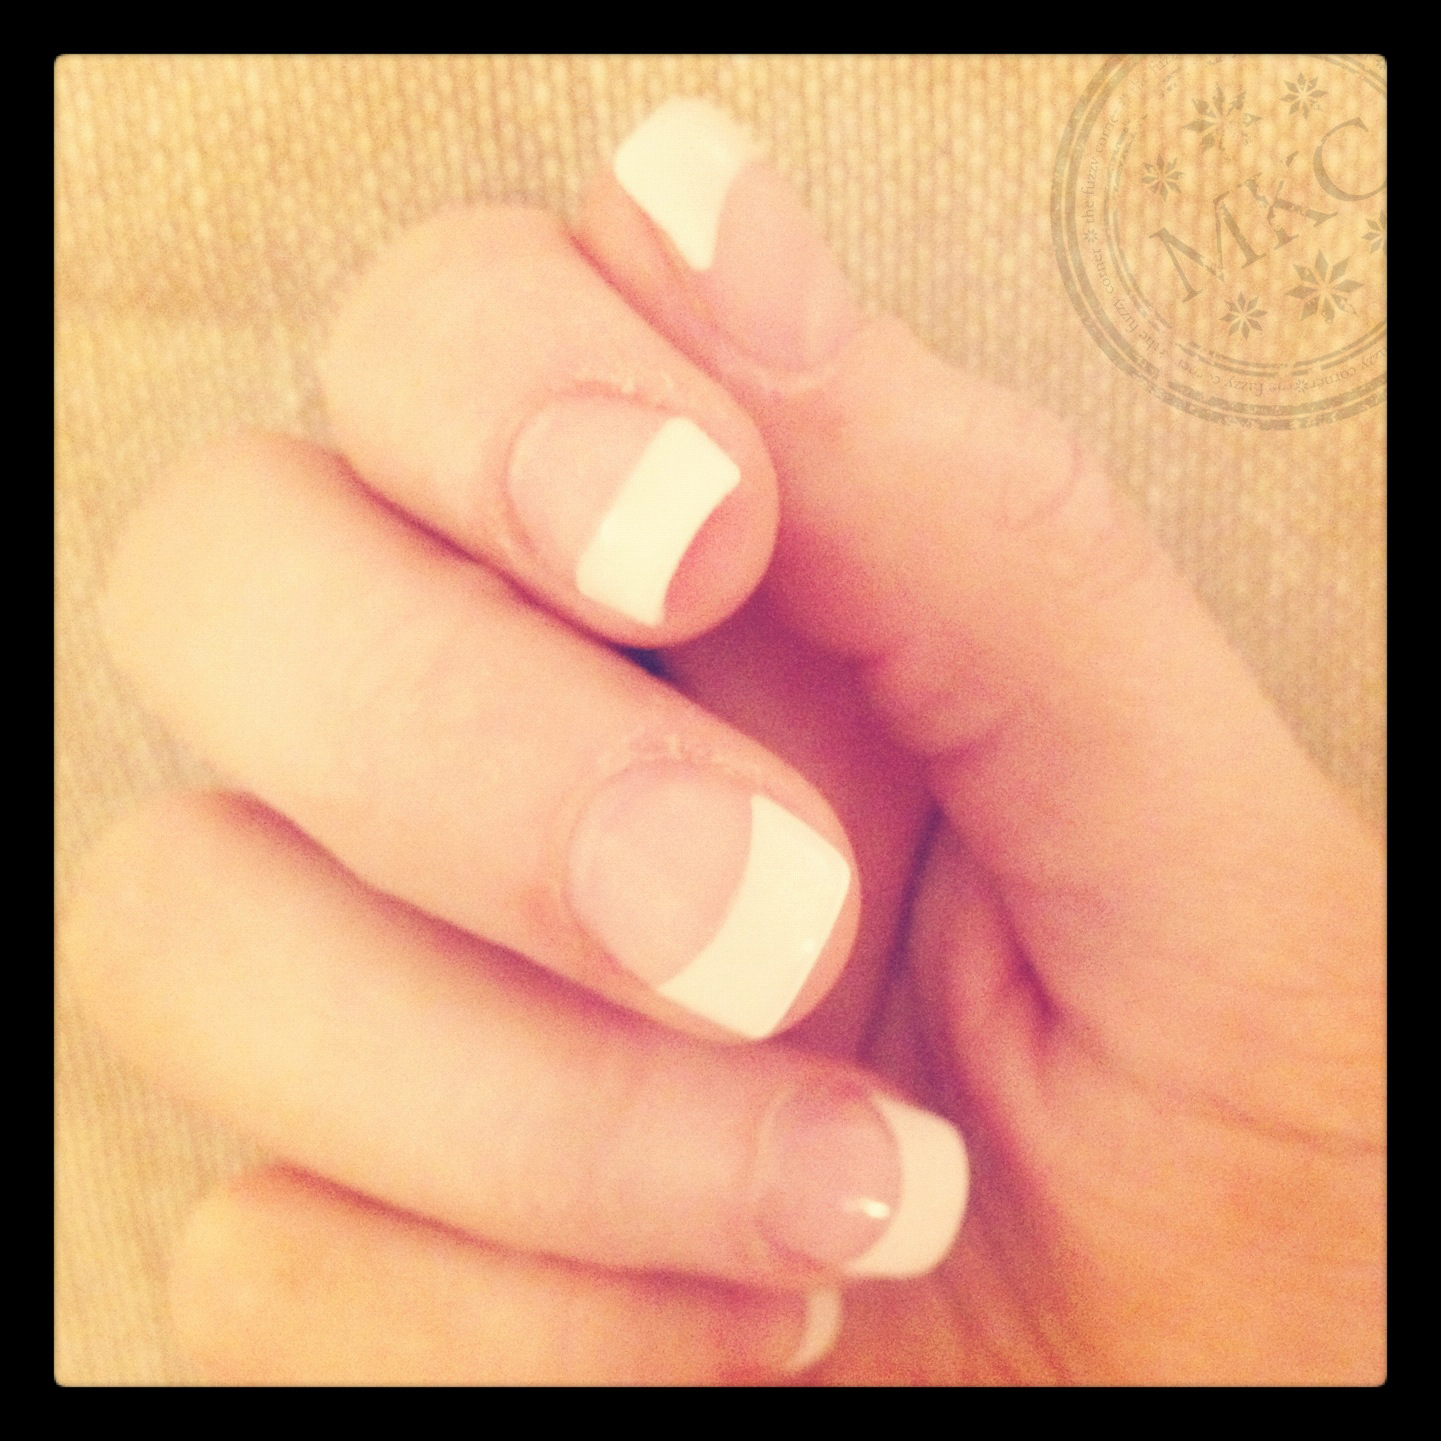
Gel nails, I love love love it, especially the french manicure version. Square with white tips, oh so pretty! ♥ ♥ ♥
I also love to do it myself at home, relaxing in the couch, while watching a movie. It's really nice to go to a salon and all, but it's a bit more special when you do it yourself. It takes a while, but it's well worth it, and it's so easy! Here, I'll explain it in a few simple steps;
(This is just a quick and general outline - if you want a detailed version, I'll write one up for you guys, just go ahead and ask ♥)
♥ You gear up and put all your equipment out on a flat surface...

♥ File your nails on top and to a short length...

♥ Push down your cuticles and make sure no skin "sticks" to your nail...

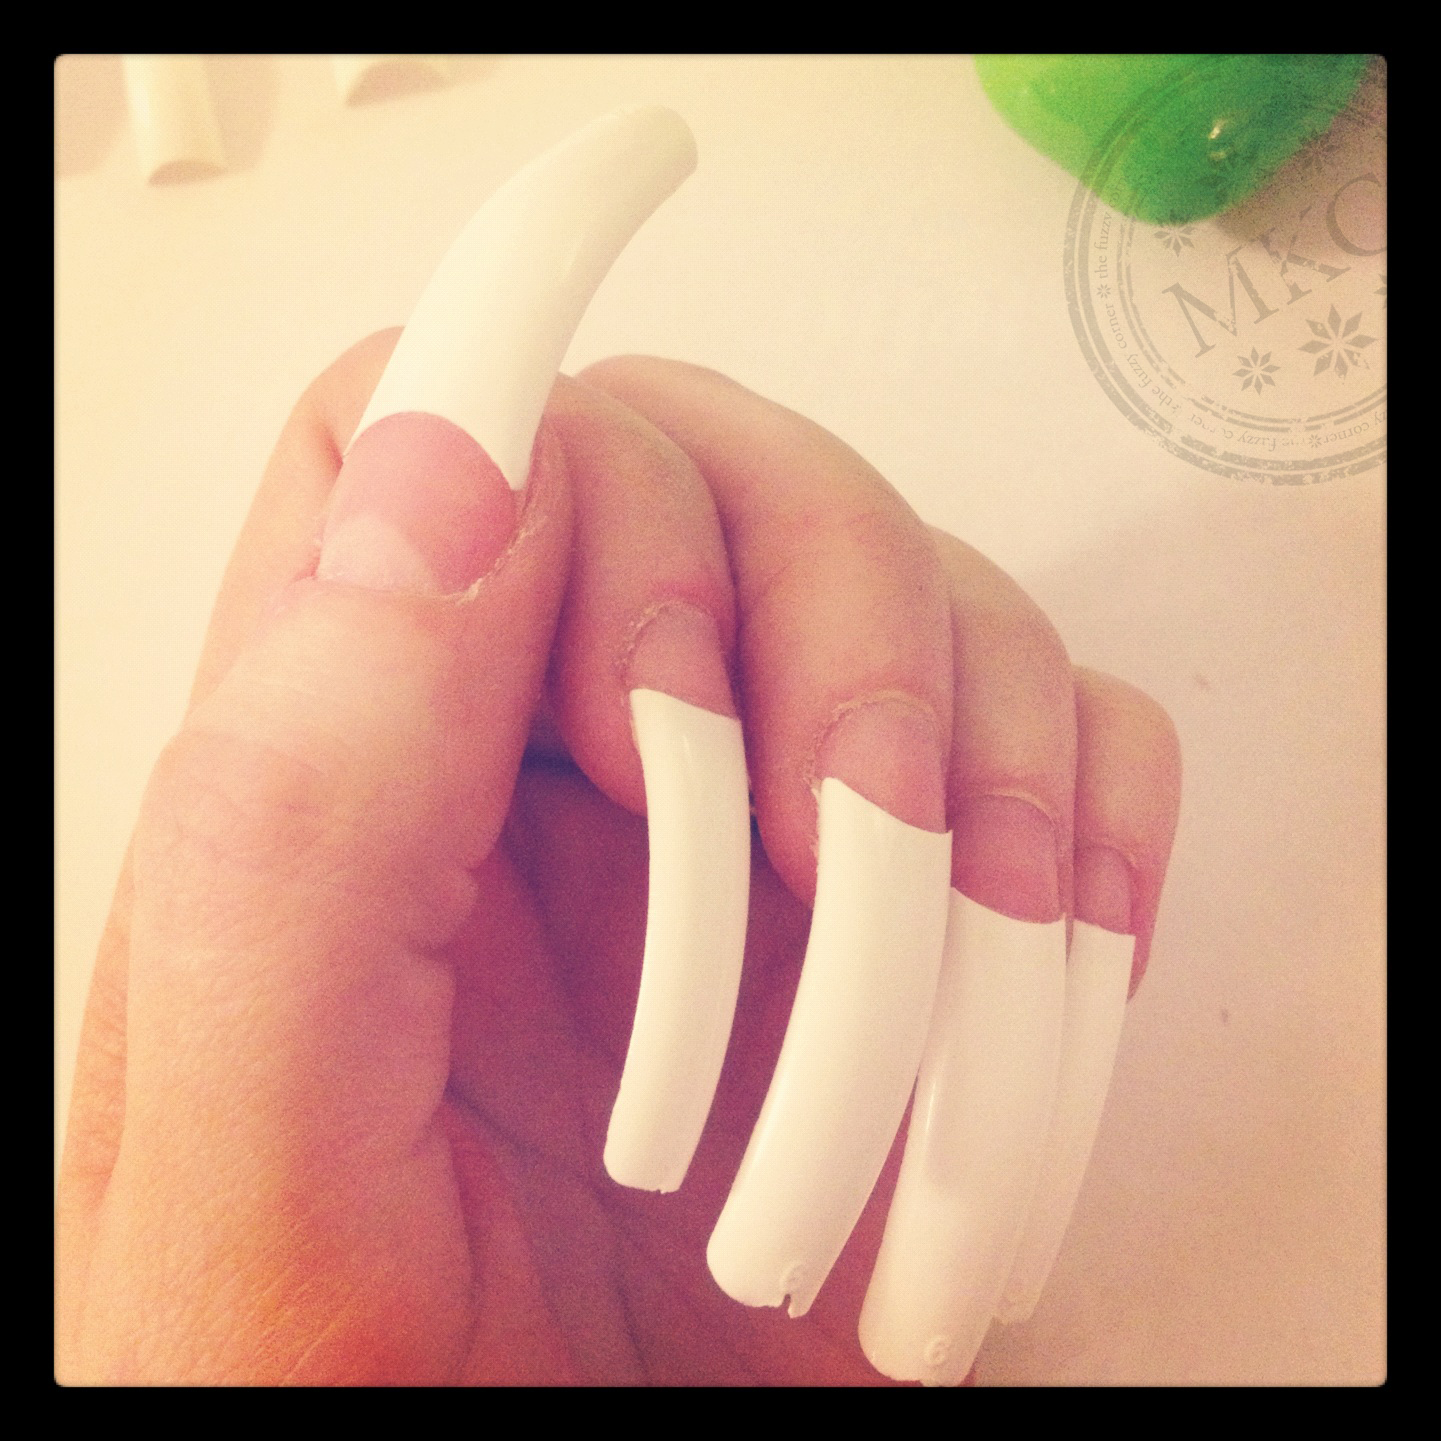
♥ Glue on your nails... I know, they look lovely at this length don't they? Don't worry, next...
♥ You cut them easily with your nail clipper, and yes you want one of these and not scissors...

♥ File away the rough edges and shine. Then you apply the gel to your nails, one by one...

♥ Cure them 2 minutes per nail...

♥ Wipe them off, add a transparent coat of nail polish and some cuticle oil...

And voila, you've got perfect nails! See, now wasn't that easy?
I bought an O.P.I starting kit at Amazon.com a few years ago, and it worked out great. It came with a training DVD that I saw several times before giving it a go. It's a really neat little package that covers all your basic needs, and I would recommend it to anyone. It's a great way to get started. I would however buy additional nails as the ones in the package had a really odd shape - at least for my fingers.
I'll add a link below in case you're curious:
http://www.amazon.com/Opi-Axxium-Gel-System-Intro/dp/B001MS79TO/ref=wl_it_dp_o_pC_nS_nC?ie=UTF8&colid=1PGF6ISFL3IHH&coliid=IIKCOUYKEBET
(This is not an ad and I'm not affiliated with Amazon or O.P.I in any way)
 |
| http://opi.com/ |
They also sell curing lamps, nail cutters, different colored gel, nail stencils for nail art, brushes and so on, so if Amazon ships to your country, you can have it all on your doorstep in no time!
There are also stores selling here in Norway if you feel like going into a shop instead of buying online.
I have seen some equipment in VITA, both gel and curing lamps, but I haven't tried out their selection yet.
If in Portugal I would check out Sephora, the same if in the USA, and in Canada I think I'd go ask in Pharmaprix or Jean Coteu - If they don't have, they will very likely know who does.
If I were you, I'd buy it online. So much easier.
(This is not an ad and I'm not affiliated with VITA in any way)
So, if you decide that you want to try it out for yourself, here are some very important tips from me to you:
♥ Make sure to never get gel on your skin! This is VERY important. The gel solidifies, and imagine what happens to your skin? It's really painful - been there, done that.
♥ Always file your nails on top before putting gel, and remember to not file horizontally. Do not file a lot. The reason for filing the top of your nail before the gel is to make the gel stick. If you don't, the gel will get air bubbles and start peeling off because it can't get a hold. You only need to file a little bit, nothing excessive.
♥ Remember to push down your cuticles before applying gel.
♥ It's good to have a bit extra nail, like on the picture above, to have more surface for the glue to stick to.
♥ I always make sure to put the white tip a few millimeters extra down on the nail so that it can grow for a longer period of time before it's starts showing the growth line.
♥ Make sure to not get any gel on your cuticles. I usually put the gel quite a bit above to make sure there is no contact between the two.
♥ When you glue on the white tips, remember to polish away the shine in the plastic. Use a nail buffer and quickly go over the tips. Be careful to not file away the actual sharp edge of the nail tip.
♥ Always put cuticle oil at the end, and massage your cuticles and fingertips.
♥ When putting the gel, hold your finger upside down, and see how the gel slides down into a perfect arch - and into the curing lamp it goes!
If you try it out, let me know how it goes! Of course, if you have any questions, fire away and I'll help if I can.
♥ ♥ ♥ Now I'm going to enjoy my newly made raspberry mousse, all sugar free and low-carb. ♥ ♥ ♥

Hugs and kisses!

Ingen kommentarer:
Legg inn en kommentar