Viser innlegg med etiketten baking. Vis alle innlegg
tirsdag 1. oktober 2013
FULL THROTTLE WITH MOODS OF NORWAY
Nå er det mulig å forhåndsbestille det kuleste vaffeljernet som finnes på denne kloden fra Moods of Norway - Det knall rosa traktorjernet!
Hvis du er som meg og elsker vafler, så er jo dette bare ett must! Dette står høyt på listen min! Ha ha ha, jeg elsker Moods of Norway. Fantastisk!
"Vaffeljernet er i seg selv ett blikkfang, med sin knall rosa farge og unike design. Komplettert med et traktorjul som regulerer steketemperatur fra "parkering" til "full guffe", får du vafler som er alt fra fluffy og lette, til knasende og superprø. Du trenger ikke lenger være redd for at du ikke har noe å servere uanmeldte gjester, og i tillegg blir det garantert et supermoro samtaletema rundt vaffelbordet! Nytes gjerne med et glass iskald melk eller til din favoritt cocktail! "
- Moods of Norway
"The coolest waffle iron ever is now available for pre-order at Moods of Norway as we speak - The Pink Tractor Iron!
If you're anything like me and love waffles, this is a must! This is sky high on my wishlist! Ha ha ha, I just love Moods of Norway.
"The waffle iron in itself is quite the eye catcher, with the crash pink exterior and unique design. Complete with a tractor wheel as the regulator for temperature, from "park" to "full throttle", will give you wonderful waffles, either light and soft, or crunchy and tasty. You no longer need to fear, not being ready to receive guests on a seconds warning, and in addition it's guaranteed a fun subject for conversation around the waffle table! Enjoy with a glass of cold milk, or with your favourite cocktail!"
- Moods of Norway"
lørdag 15. juni 2013
CUPCAKE SATURDAY
Today it's all about baking! Looking forward to test out some new cupcake recipes for tomorrow - I really hope they turn out yummy.
Can you guess one of the flavors I'll be making? ;)
I've gotten hold of some new "toys" as well for the decorating process, so this is going to be fun! ;)
First time ever I'm using a Wilton M1 (that I've been drooling over forever), and fondant. I'm going to attempt a fondant rose to top of one of the cupcakes.
I'll of course be posting pictures later - taken with my new camera! I got the Nikon for my birthday with a 35 mm lens = Miss Happy Camper! :)
These babies better turn out good! *crossing fingers*
Alright, time to roll up my sleeves and get started!
Wish me luck!
Have a great weekend guys and gals!
Can you guess one of the flavors I'll be making? ;)
I've gotten hold of some new "toys" as well for the decorating process, so this is going to be fun! ;)
First time ever I'm using a Wilton M1 (that I've been drooling over forever), and fondant. I'm going to attempt a fondant rose to top of one of the cupcakes.
I'll of course be posting pictures later - taken with my new camera! I got the Nikon for my birthday with a 35 mm lens = Miss Happy Camper! :)
These babies better turn out good! *crossing fingers*
Alright, time to roll up my sleeves and get started!
Wish me luck!
Have a great weekend guys and gals!
Labels:
baking
mandag 25. mars 2013
I ♥ Waffles
Today is The Big Waffle Day! At least here in Scandinavia :) So it's time munch some waffles!
And as you know...
Here is a waffle recipe rich in protein and low in white carbs from Kristine Weber. Enjoy!
Recipe:
3 eggs
1 egg white
20 gr almond flour
20 gr vanilla protein powder
10 gr xantham gum
1-2 tblsp icing sugar replacement
A dash of milk
1 tsp of cinnamon and kardemom
Remember to use butter for when frying the waffles so that they don't stick! I'll be enjoying these beauties for breakfast tomorrow. Mmmmm Yum!
Happy Waffle Day!
And as you know...
Here is a waffle recipe rich in protein and low in white carbs from Kristine Weber. Enjoy!
Recipe:
3 eggs
1 egg white
20 gr almond flour
20 gr vanilla protein powder
10 gr xantham gum
1-2 tblsp icing sugar replacement
A dash of milk
1 tsp of cinnamon and kardemom
Remember to use butter for when frying the waffles so that they don't stick! I'll be enjoying these beauties for breakfast tomorrow. Mmmmm Yum!
Happy Waffle Day!
torsdag 14. februar 2013
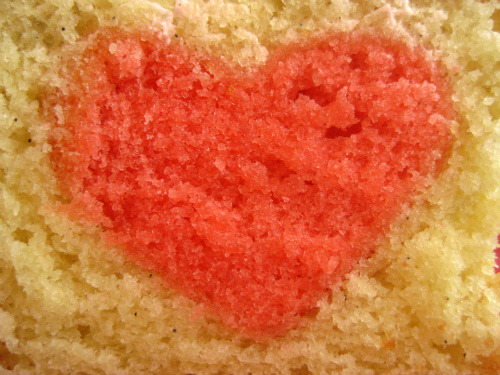
Valentines Recipe - Cupcake with Heart!
"These vanilla bean cupcakes really have heart. Cut or bite into one to see how much love went into them. The best part: they’re surprisingly simple. And if your sweetheart happens to be a chocolate fan, you could just as easily bake your heart into some chocolate cake batter. If you go that route, I recommend finishing them off with generous spoonful of decadent ganache for a true death-by-chocolate experience."
- bakeitinacake.com -
Makes 12 cupcakes
Cupcakes Ingredients
¾ cup (1½ sticks) unsalted butter, at room temperature
1½ cups granulated sugar
3 large eggs
Seeds from 1 vanilla bean
2 teaspoons baking powder
½ teaspoon baking soda
¼ teaspoon salt
2½ cups unbleached all-purpose flour
1⅓ cups whole milk
Red food coloring
1½ cups granulated sugar
3 large eggs
Seeds from 1 vanilla bean
2 teaspoons baking powder
½ teaspoon baking soda
¼ teaspoon salt
2½ cups unbleached all-purpose flour
1⅓ cups whole milk
Red food coloring
Frosting Ingredients
10 bite-sized pieces strawberry taffy2 tablespoons heavy cream
1 cup (2 sticks) unsalted butter, at room temperature
2 cups powdered sugar
12 pieces Sweetheart candy
1 cup (2 sticks) unsalted butter, at room temperature
2 cups powdered sugar
12 pieces Sweetheart candy
♥ To make the cupcakes, preheat the oven to 350°F, use
a nontoxic marker to make a small dot on the edge of 12 paper liners
and place them in one standard muffin tin, with all the dots facing the
same direction. Use a stand mixer fitted with the paddle attachment or a
hand mixer on medium speed to combine the butter and sugar for 90
seconds, until fluffy. Add the eggs, one at a time, mixing in each egg
completely before adding the next. With the mixer on medium-low speed,
add the vanilla seeds, baking powder, baking soda, and salt. Use a
spatula to scrape down the sides of the bowl, then turn the mixer up to
medium-high speed and mix for another 30 seconds, until all the
ingredients are well combined. Finally, add the flour, ½ cup at a time,
alternately with the milk, ⅓ cup at a time, mixing until each addition
is fully incorporated before adding the next. Scrape down the sides of
the bowl one more time and continue to mix the batter on medium-high
speed another 30 seconds. It should be smooth and creamy.
♥ Pour approximately 1½ cups of the batter into a
smaller bowl. This will be for the hearts. Use a spoon to stir in red
food coloring, 2 or 3 drops at a time, until you get your desired shade
of red or pink. Keep in mind the color will lighten a little while
baking. Pour the pink batter into a nonstick or lightly greased 8-inch
square baking pan and bake for about 20 minutes, until a toothpick
inserted into the center of the cake comes out clean. Allow the cake to
cool completely. (It’s okay to stick it in the fridge to speed it up—I’m
impatient too.)
♥ Once the sheet cake is cool, loosen the cake from the pan by running a knife around the edges of the cake. Carefully invert the pan onto a cutting board. Use a 2-inch heart-shaped cookie cutter to cut out 12 hearts. If you can’t find a small heart-shaped cookie cutter, draw a heart on some clean cardboard and use that as a stencil to cut the hearts out with a small knife.
♥ Spoon 2 heaping tablespoons of the remaining plain batter into the prepared tins. Place a heart in each cup, with the bottom of the heart pointing down and the front of the heart facing the dot on the cupcake paper. Press the heart gently into the batter. Cover the top of the heart with another teaspoon of batter. Bake for 24 minutes, or until the edges of the cupcakes have started to turn golden brown and the cake springs back when you gently press your finger into the top of it. Allow the cupcakes to rest in the tins for 10 minutes before transferring them to a wire rack to cool while you make the frosting.
♥ To make the frosting, melt the taffy and cream together in a microwave in a small, microwave-safe bowl for 20 seconds on high. Stir and microwave for another 20 seconds, repeating until the mixture has melted. When the taffy mixture is smooth, put the bowl in the fridge so it cools a bit before being added to the frosting (the cream will keep the taffy from hardening). Meanwhile, using a stand mixer with the whisk attachment or a hand mixer, whip the butter for 30 seconds at medium speed until creamy. Add the powdered sugar ½ cup at a time, whipping at medium speed until fluffy. With the mixer on medium-low, drizzle in the cooled taffy cream. Finally, turn the mixer to high and whip the frosting for 30 seconds, until it is pale pink and fluffy. If you’d like the frosting to be a darker shade of pink, add a couple drops of red food coloring. Pipe or spread the frosting on top of the cupcakes. Place a candy heart on top of each cupcake, point down, facing in the same direction as the dot on the cupcake wrapper so people will know which way to bite into the cupcake to see the heart. Love!
Tip:
Don’t know how to use vanilla bean? It’s easy.
The vanilla bean has a wonderful, clean vanilla flavor, and it can
replace vanilla extract in almost any cake recipe. To get the seeds from
the vanilla bean, use a sharp knife to cut the bean in half lengthwise.
Scrape the blade of the knife along both sides of the inside of the
bean, scooping out all the seeds. The black seeds are very small, and
they’ll stick together. Use a spatula or spoon to get the scrape the seeds off the knife, then mix them into your batter.
Original Recipe from bakeitinacake.com
onsdag 6. februar 2013
Healthy & Low Carb - Orange & Chocolate Muffins
So, time for some work-out chat and some protein baking goodness!
Nice and heavy strength session today, with focus on arms and back. My triceps were already screaming from yesterdays extensions, but here there's no mercy!
Todays Session:
Treadmill: Warmup 10 min, incline 12, speed 6
Deadlift: 50-60-70
Tricep-extensions - dumbbell
Standing one arm Row
Seated Row
Cable Curl
It might not look tough, but trust me, it was. I'm so glad there were no body around with a camera! Just sayin! It takes a bit to make me whimper! Ha ha! :) In other words, a good work-out!
Unfortunately I didn't manage my 80 kgs during Deadlift today, and I know why.
I was already sore from the work-out from the day before, and my body was sending signals telling me to take it down a notch. I know I'll be back up there in no time.
It's OK to not go 110% if your body is telling you no. Always listen to and respect your body. Give it time to recover, and come back stronger when your body is ready.
But now, over to a much tastier subject...
Muffin Recipe - Ingredients:
2 eggs
1 egg white
20gr coconut flour
20gr chocolate protein powder
15gr dark cocoa powder
1 ts baking powder
5 tbsp icing sugar replacement
Juice from max half an orange (careful as it makes the batter very liquid)
4-5 drops of Stevia Vanilla
4-5 drops of Stevia Chocolate
Orange Zest from half an orange
How to Proceed:
Remember to check the muffins to see if they're done, using a wooden toothpick. Stick i into the middle. If it comes out dry, they're finished.
If you use the medium sized muffin tray you should get around 7 muffins from this batter - in other words around 58 healthy and protein packed kcal per muffin! ♥
Frosting Ingredients:
As the muffins are cooling down, create a nice and easy frosting. You'll need:
How to Proceed:
I would not recommend using juice from the orange in the frosting as it get's very liquid. Take around 100 grams of creme cheese, add loads of icing sugar replacement, taste your way with amount of vanilla, and add bit by bit of some orange zest.
Let the Muffins be completely cold before you put on the frosting, or it will melt and likely slide off. If you feel that the frosting is a bit liquid, stick it into the fridge and let it cool down for a few hours.
If you're like me and can't wait, just dip the muffin in the frosting, and enjoy - liquid or not! Mmmmmyum! :)
Happy & Healthy baking to you guys!
Nice and heavy strength session today, with focus on arms and back. My triceps were already screaming from yesterdays extensions, but here there's no mercy!
Todays Session:
Treadmill: Warmup 10 min, incline 12, speed 6
Deadlift: 50-60-70
Tricep-extensions - dumbbell
Standing one arm Row
Seated Row
Cable Curl
It might not look tough, but trust me, it was. I'm so glad there were no body around with a camera! Just sayin! It takes a bit to make me whimper! Ha ha! :) In other words, a good work-out!
Unfortunately I didn't manage my 80 kgs during Deadlift today, and I know why.
I was already sore from the work-out from the day before, and my body was sending signals telling me to take it down a notch. I know I'll be back up there in no time.
It's OK to not go 110% if your body is telling you no. Always listen to and respect your body. Give it time to recover, and come back stronger when your body is ready.
But now, over to a much tastier subject...
Low Carb & High Protein
- Orange & Chocolate Muffins -
(Now that's quite a mouthful... pun intended)
These are really tasty. The recipe is from our lovely Kristine Weber, with some minor tweaks from me.
![]() |
| ...can I get a "yum"? |
Muffin Recipe - Ingredients:
2 eggs
1 egg white
20gr coconut flour
20gr chocolate protein powder
15gr dark cocoa powder
1 ts baking powder
5 tbsp icing sugar replacement
Juice from max half an orange (careful as it makes the batter very liquid)
4-5 drops of Stevia Vanilla
4-5 drops of Stevia Chocolate
Orange Zest from half an orange
How to Proceed:
- Whip to eggs well together with stevia and the icing replacement.
- Slowly add the dry ingredients, a bit at a time.
- Add some orange juice and zest - taste to see how much orange flavor you want. The zest adds a lot of wonderful flavor.
- At the end, whip the egg white until stiff in a separate bowl, and carefully blend it into the batter.
- Pour into a muffin tray and bake in the oven on 180 C for about 17-22 minutes.
Remember to check the muffins to see if they're done, using a wooden toothpick. Stick i into the middle. If it comes out dry, they're finished.
![]() |
| My little muffin army of healthy goodness! |
If you use the medium sized muffin tray you should get around 7 muffins from this batter - in other words around 58 healthy and protein packed kcal per muffin! ♥
Frosting Ingredients:
As the muffins are cooling down, create a nice and easy frosting. You'll need:
- Creme Cheese (Philadelphia )
- Icing Sugar replacement
- Stevia vanilla
- Orange zest
How to Proceed:
I would not recommend using juice from the orange in the frosting as it get's very liquid. Take around 100 grams of creme cheese, add loads of icing sugar replacement, taste your way with amount of vanilla, and add bit by bit of some orange zest.
Let the Muffins be completely cold before you put on the frosting, or it will melt and likely slide off. If you feel that the frosting is a bit liquid, stick it into the fridge and let it cool down for a few hours.
If you're like me and can't wait, just dip the muffin in the frosting, and enjoy - liquid or not! Mmmmmyum! :)
![]() |
| ♥ Yummy Little Muffin being consumed while Knitting ♥ |
Happy & Healthy baking to you guys!
tirsdag 29. januar 2013
Low Carb Mocca Muffins
Amazingly Yummy Mocca Muffins!
The original recipe belongs to Kristine Weber, and then it was tweaked a bit and translated by me. ;)
Enjoy!
Muffin Recipe:
2 egg
1 tbsp kesam/translates to Quark Cheese
30g coconut flour
20g chocolate protein
1 topped tbsp cocoa
1/2 tbsp yacon sirup
1/2 cup espresso
2 tbsp icing sugar replacement
A few drops of Stevia chocolate
a small dash of salt.
(Splenda or other sweetener)
(Taste and see if extra sweetener is required. If so, add desired amount of splenda.)
How to Proceed:
- Separate the eggs in two bowls - one for the yolk, one for the whites.
- Whip the yolks together with the kesam, yacon sirup, icing sugar replacement, stevia and espresso.
- Then add the coconut flour, chocolate protein, cocoa and the dash of salt. Blend until in turns into a sticky batter.
- Whip the egg whites until they turn completely white and stiff.
- Carefully blend the egg whites into the chocolate batter.
- Fill in muffin cups and put them in the oven at 170 degrees C for about 12 minutes. Test to see if they're done by using a wooden toothpick and see if it comes out dry. If dry, they're all done!
![]() |
| My mini muffin army |
These babies consists of mainly yummy protein :) Awesome snack, low kcal, low carb, and low fat!
If you split this over 9 muffins you get:
Kcal: 40
Protein: 5 g
Carb: 1,1 g
Fat: 1,7 g
In addition to the original recipe I created a chocolate cream cheese frosting.
Creme Chese Chocolate Recipe:
100 gr Philadelphia light (light creme cheese)
2 1/2 tbsp cocoa - depending on how chocolaty you want it
A few drops of Stevia vanilla
Sweetener - taste to desired amount
How to Proceed:
Put the Creme Cheese in a bowl. Add the cocoa and Stevia. Blend until you get a smooth mixture. Start adding sweetener and taste as you to. That's that!
Since I got this pink beauty for Christmas I split them even smaller, about half, so I got this little army of 16 sweet protein balls of goodness! Love it! The name of this muffin maker says it all. :)
![]() |
| Tiny adorable yummy muffin |
![]() |
| I love this - it's awesome |
![]() |
| It seriously can't get easier to bake muffins |
My final result with the creme cheese frosting ended up at around 30-40 kcal per muffin.
So sit back, grab a muffin, and enjoy healthy goodness!
Have a good one!
søndag 20. januar 2013
Winners and Waffles!
So, I
finally decided which sweater to go for! And the winner iiiiis.... *drumroll*
Tadaaaaaaa! The VM 2013 sweater! This one is going to keep me going for a long while I'm sure.
It was so nice popping by the yarn store yesterday. I've never seen young women working in a yarn store - normally around here there are lovely ladies in their 50s - so when not just one, but two in their twenties came to help me out I was positively surprised to say the least. They really knew what they were doing too.
Funny, but it makes me happy to see more of my generation knitting! :)
We made sour cream waffles yesterday like I mentioned, and they turned out really yummy!
They were not the regular version, but low carb from a book by the blogger Cecilie Theiste-Bratli. Check out her blog; fristendelavkarbo.no "tempting low-carb". You can find her book by the same name here.
She's got several low carb recipes on her blog as well if you're curious. :)
I added some more sweetener since I like my waffles sweet, but overall the original recipe was really good. With homemade blueberry jam it was heaven!
Next time I'll be testing out protein waffles! :)
On a sidenote...
I've finished my last knitting project and will be posting pictures of it - as well as of the previous cap - soon!
Hope you guys are having a relaxing Sunday
Tadaaaaaaa! The VM 2013 sweater! This one is going to keep me going for a long while I'm sure.
It was so nice popping by the yarn store yesterday. I've never seen young women working in a yarn store - normally around here there are lovely ladies in their 50s - so when not just one, but two in their twenties came to help me out I was positively surprised to say the least. They really knew what they were doing too.
Funny, but it makes me happy to see more of my generation knitting! :)
We made sour cream waffles yesterday like I mentioned, and they turned out really yummy!
They were not the regular version, but low carb from a book by the blogger Cecilie Theiste-Bratli. Check out her blog; fristendelavkarbo.no "tempting low-carb". You can find her book by the same name here.
She's got several low carb recipes on her blog as well if you're curious. :)
I added some more sweetener since I like my waffles sweet, but overall the original recipe was really good. With homemade blueberry jam it was heaven!
Next time I'll be testing out protein waffles! :)
On a sidenote...
I've finished my last knitting project and will be posting pictures of it - as well as of the previous cap - soon!
Hope you guys are having a relaxing Sunday
lørdag 12. januar 2013
The Big Brownie Experiment!
I had to have something sweet.... there was just no way around it...
So, since I was going to have something caloric one way or another, I figured I might as well do my best to make it as healthy as possible.
I didn't have much around, and the stores were closed... what to do. Didn't really have a lot of ingredients for anything at all really, so baking from scratch wasn't really an option.
Luckily for me I found a low-carb brownie mix that I could use, all the way in the back of the closet. Last time when I tried it I remember I was thinking; Hmmm, sure, it's good... but how can I make it better?
So, this time around I got creative, and the result is absolutely awesome! Seriously, I could eat the whole thing in one go! Yum!
I followed the recipe on the bag, but decided to add some of my own ingredients to add something to make the brownies a bit more healthy, at least in my opinion.
I added two types of protein powder to the mix, both chocolate and neutral. I did this after I had added the wet to the mix so that I had a better idea of the final consistency. I had no measures to go by, so I kept adding until I felt that the brownie mix was starting to feel more solid. At the end I added four tsp of liquid sweetener to the mix as well, which made it even more tasty.
It turned out perfect! It still kept the dense texture and feel of the brownie, but it wasn't as sticky as the last time. It felt a bit lighter.
Now I was left with a problem - the frosting! What on earth to do for a frosting? Now this is where the total randomness starts. After digging through fridge and closets, I managed to find some potentially usable ingredients. Dark Cocoa powder, Icing Sugar replacement, skim milk, Stevia English toffee and a bag of powdered low sugar vanilla sauce.
I had no idea if this was going to work...
I started with the vanilla sauce.
Instead of adding the 7.5 dl of milk to it, I added only 2 dl of milk instead. I wouldn't want it to get too liquid. While I was waiting for it to boil and thicken, I added several topped tbsp of dark cocoa powder. I kept adding until I was satisfied with the rich chocolate flavour.
The mix thickened, and then I added six drops of the Stevia English toffee that I stirred in.
When the mix had thickened, and I had stirred it for a few minutes, the taste was really intense. At this point I added the Icing Sugar replacement until the taste was right.
Voila! Perfect icing for the brownie!
Above you see the initial result, when it's still warm. Yummmm! It actually get's even better after a night in the fridge as you can see below.
Ooooh, chocolate brownie love ♥ I'm still amazed at how incredibly good it turned out. Seriously, if you have the chance, try it out! A healthier version of a brownie - what's not to love? :)
...Having this thing out of the fridge is seriously damaging my dinner today! Chocolate brownie for dinner? Does that sound like a good idea? :P
Tifa and I wish you a great Saturday!
So, since I was going to have something caloric one way or another, I figured I might as well do my best to make it as healthy as possible.
I didn't have much around, and the stores were closed... what to do. Didn't really have a lot of ingredients for anything at all really, so baking from scratch wasn't really an option.
Luckily for me I found a low-carb brownie mix that I could use, all the way in the back of the closet. Last time when I tried it I remember I was thinking; Hmmm, sure, it's good... but how can I make it better?
So, this time around I got creative, and the result is absolutely awesome! Seriously, I could eat the whole thing in one go! Yum!
I followed the recipe on the bag, but decided to add some of my own ingredients to add something to make the brownies a bit more healthy, at least in my opinion.
I added two types of protein powder to the mix, both chocolate and neutral. I did this after I had added the wet to the mix so that I had a better idea of the final consistency. I had no measures to go by, so I kept adding until I felt that the brownie mix was starting to feel more solid. At the end I added four tsp of liquid sweetener to the mix as well, which made it even more tasty.
It turned out perfect! It still kept the dense texture and feel of the brownie, but it wasn't as sticky as the last time. It felt a bit lighter.
Now I was left with a problem - the frosting! What on earth to do for a frosting? Now this is where the total randomness starts. After digging through fridge and closets, I managed to find some potentially usable ingredients. Dark Cocoa powder, Icing Sugar replacement, skim milk, Stevia English toffee and a bag of powdered low sugar vanilla sauce.
I had no idea if this was going to work...
I started with the vanilla sauce.
Instead of adding the 7.5 dl of milk to it, I added only 2 dl of milk instead. I wouldn't want it to get too liquid. While I was waiting for it to boil and thicken, I added several topped tbsp of dark cocoa powder. I kept adding until I was satisfied with the rich chocolate flavour.
The mix thickened, and then I added six drops of the Stevia English toffee that I stirred in.
When the mix had thickened, and I had stirred it for a few minutes, the taste was really intense. At this point I added the Icing Sugar replacement until the taste was right.
Voila! Perfect icing for the brownie!
Above you see the initial result, when it's still warm. Yummmm! It actually get's even better after a night in the fridge as you can see below.
Ooooh, chocolate brownie love ♥ I'm still amazed at how incredibly good it turned out. Seriously, if you have the chance, try it out! A healthier version of a brownie - what's not to love? :)
...Having this thing out of the fridge is seriously damaging my dinner today! Chocolate brownie for dinner? Does that sound like a good idea? :P
Tifa and I wish you a great Saturday!
onsdag 19. desember 2012
Moments - Norwegian Pepperkaker
Pepperkaker, or Ginger biscuits, is mandatory around here at Christmas time. This year is the first year I'm actually baking them myself, and from scratch. Mama's recipe, of course ;)
For the occasion I bought some really nice cookie cutters - and having some kitty ones were a given. :)
![]() |
| ♥ ♥ ♥ |

![]() |
| Neither of these are meant for these type of cookies, but what the heck! I think they turned out super cute :) |

![]() |
| Trying (and failing) to write God Jul (Merry Christmas) on a cookie... |
![]() |
| Ha ha ha, what do you think about the smiley star and martini glass? Epic :) |
On Friday the actual Christmas break and celebrations starts for us, and I can't wait to try out the cookies... a bit sad to only cook and not being able to taste. Oh well, soon I shall has cookies! My body will probably go in to sugar shock! Ha ha ha :) Just kidding, I'm sure I'll be just fine.
The two best assistants we could ever ask for was of course giving a helping paw!
![]() |
| Pardon the blurry picture, but the baking helper didn't want to sit still! :) |
Good luck onwards with Christmas preparations guys and gals! :)
Have a good one!

mandag 17. desember 2012
Shaky Arms and Rebellious Baking!
Days are just flying past - Christmas is seriously sprinting towards us on Red Bull! It's just going so fast - again!
There will be fewer updates on the blog as we get closer to Christmas I'm afraid, and the schedule in this house is really full at the moment, as I'm sure yours is as well. :)
I will skip the "Monday Lol's" today, and show you a little experiment I did here the other day instead. :)
After an especially really hard-core work-out session, and months and months on diet, I had a chat with my doctor.
I was so thrilled, thinking that I would finally be done with my strict diet, and go over on "normal" low-carb. This was unfortunately not the case!
I was soooo disappointed - I had been looking forward to experimenting with all the low-carb recipes I've been stocking up on and drooling over lately...
So, all exhausted and shaky I kinda ended up thinking; seriously, screeeew this, I deserve a little break, and not to mention something yummy... and proceeded with making mah girl Kristine Weber's "Loffeboller" (A.K.A lazy buns - directly translated) Thanks for a great recipe Kristine! I made the version with icing sugar, vanilla cream and coconut on top - "Sunne Skoleboller". Mmmmmm :)
And let me tell you - yummy they were! It was so worth it!
I've translated the recipe for you guys in case you want to give it a go.
This recipe is for 3 buns.
BUNS
1 egg
3 egg whites3 Tbls bakepro
2 Tbls coconut flour
1 ts fiber husk (I think you can use xantham gum instead if needed)
a dash of milk
VANILLA CREAM
Eldorado Vaniljesaus - mix it with only 3 dl skimmed milk instead of the 7,5 that it says on the packaging, and it's absolutely perfect!
If you do not have this brand, test out a low-sugar, low calorie version of a Vanilla Sauce with half of the fluid it's supposed to take.
ICING
Sukrin Melis and water - mix until you reach wanted consistency.
Drizzle some coconut on top of the icing.
![]() |
| Mix all the ingredients together, except for the two egg whites |
![]() |
| Whip the egg whites until they're stiff |
![]() |
| and carefully blend them in with the rest of your mix |
BAKING INSTRUCTIONS
Put
the oven to 180 degrees C.
Create 3 sticky lumps on baking paper on a
tray, and create a bump in the middle for the vanilla cream.
Put them
in the oven for about 8-10 minutes, and then take them back out.
Now
put the vanilla cream in the center, and back into the over on 200
degrees C for another 10-15 minutes.
Mix your icing sugar and put desired amount on top together with some coconut.
This recipe is at about 100 calories per bun, including the icing and vanilla cream! What's not to love about that!

![]() |
Sure, diets are all good - but everyone should be allowed to enjoy life a bit in-between, allow themselves a little breathing space - by this I don't mean; jump into the nearest chocolate cake, head first...
If you need a diet break, a good strategy is to go with the lesser evil - make something healthy!
Research! The internet has an enormous variety of recipes and inspiration.
![]() |
| Mmmmmmmm |
![]() |
| So Yummy |
These buns are not just tasty, but they are healthy too - much healthier then their sugary "cousins". All in all it was faaar from the biggest splurge I could have done diet wise.
I totally recommend trying them out! :)
Abonner på:
Innlegg (Atom)